Build Free Website
Build Free website
Create Github Free Hosting
- Go to the GitHub sign up page. Github
-
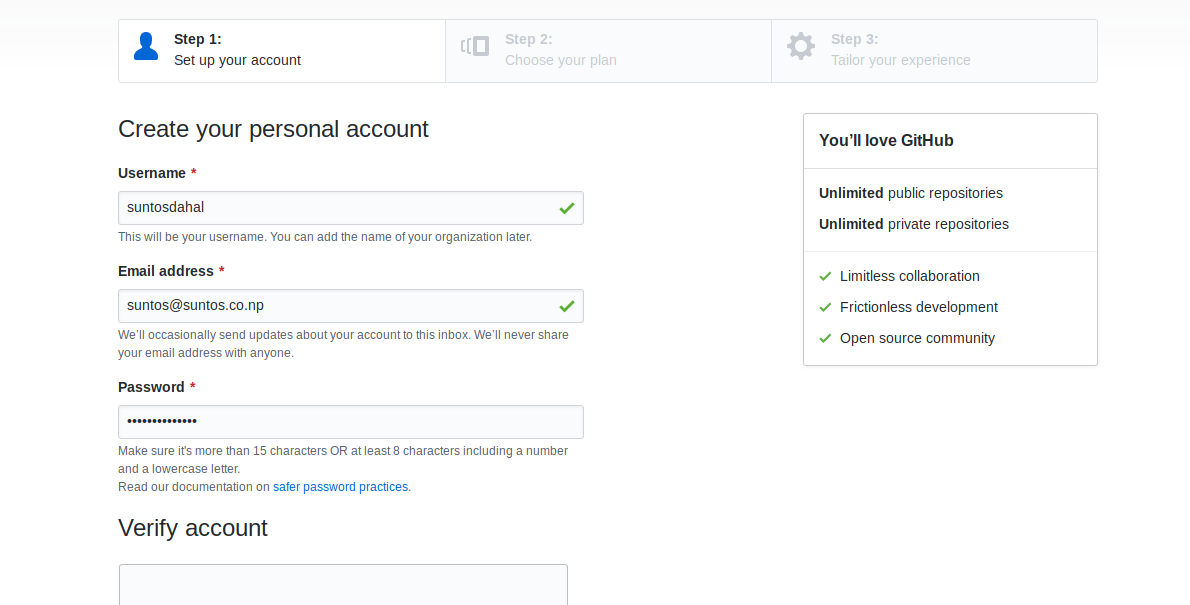
Enter a
username,valid email address, andpassword. -
Click the “Create an account” button .
-
Choose a plan. You have two choice: Free and paid, the paid version has private repositories with $7/month. You do not have to any thing , Just click on Continue .

-
Tailor experience. If you have time, fill in the survey or skip it.
-
Congratulations! Your Github page created!
-
Verifiy Your Email Address
-
Now Login using your credential
-
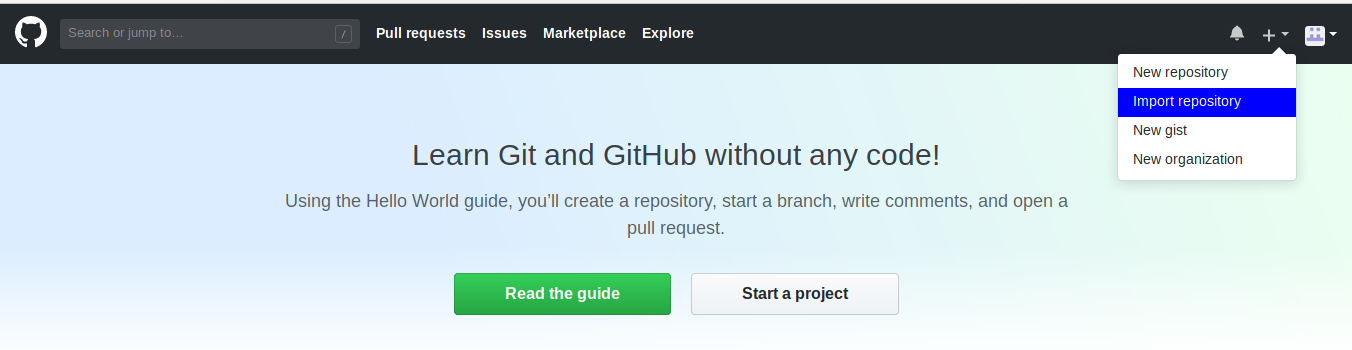
Click on import repo as shown in figure
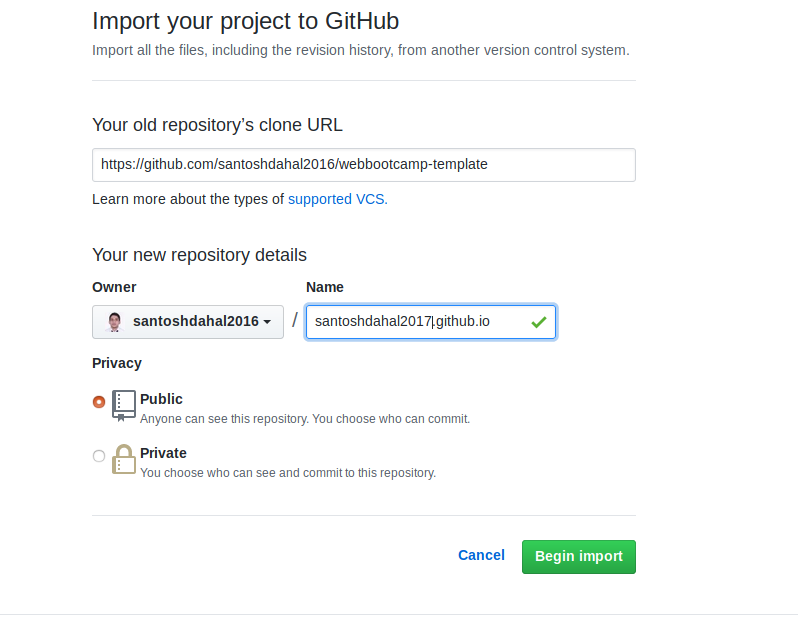
- Your old repository’s clone URL to https://github.com/santoshdahal2016/webbootcamp-template as shown in figure
-
Click on Begin import
-
Wait for 2-3 minutes , Now you can access
your_github_username.github.iowebsite in browser
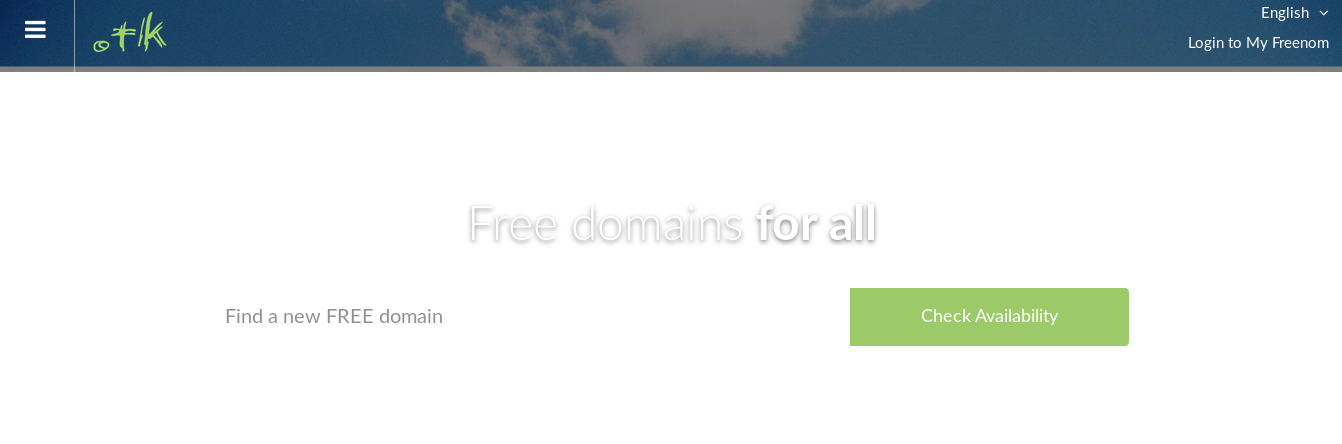
Create Free Domain
- Go to dot.tk Dot.tk
- Check Required Domain Avialability
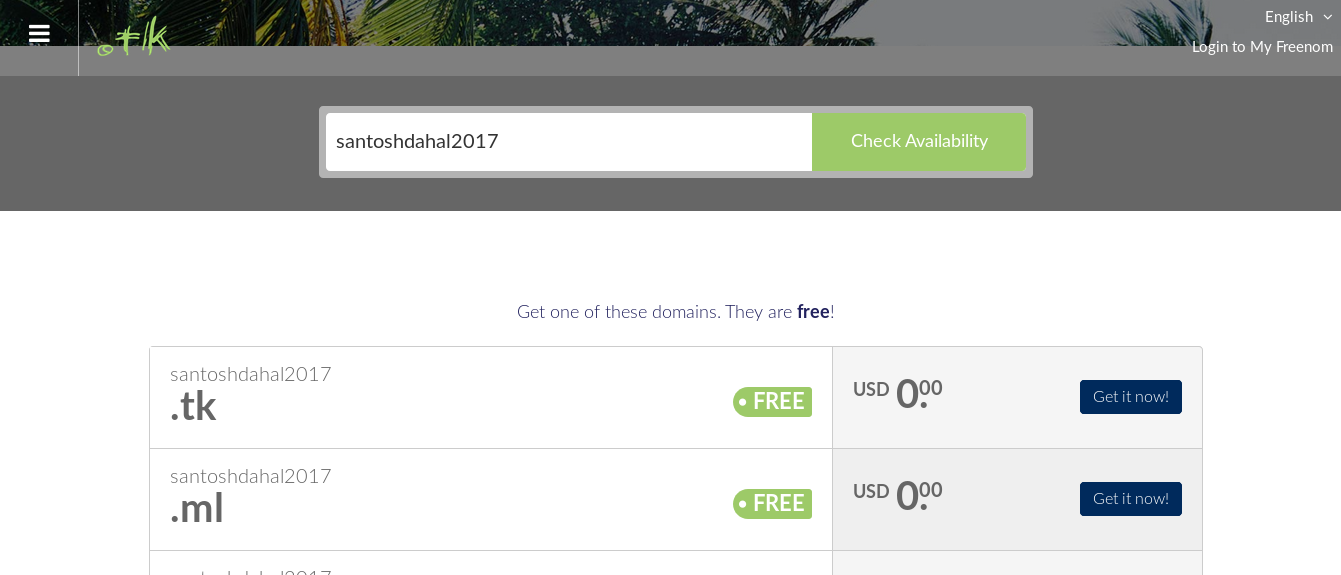
-
Click on Get it Now of your desired domain
-
Click on Checkout
-
Set DNS as shown in figure
Use DNS>Use Your own DNSand click on continue
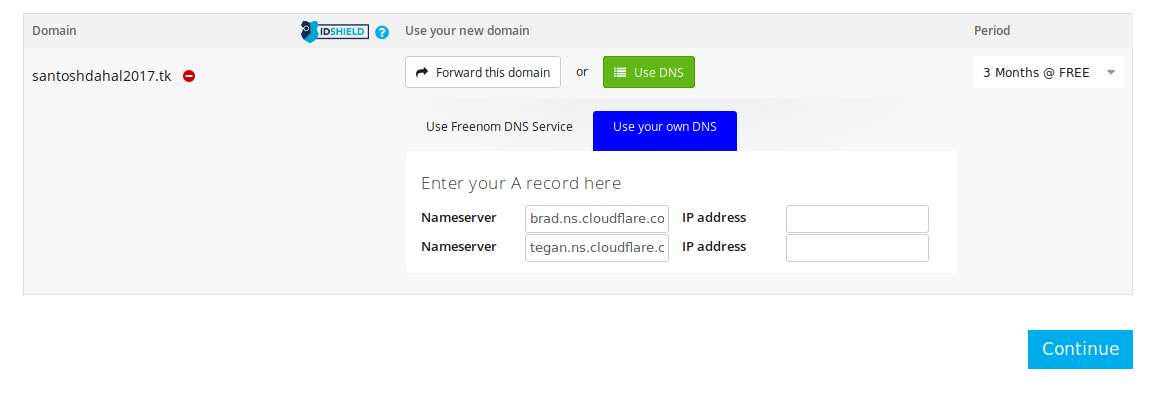
Set nameserver :
brad.ns.cloudflare.com and tegan.ns.cloudflare.com
-
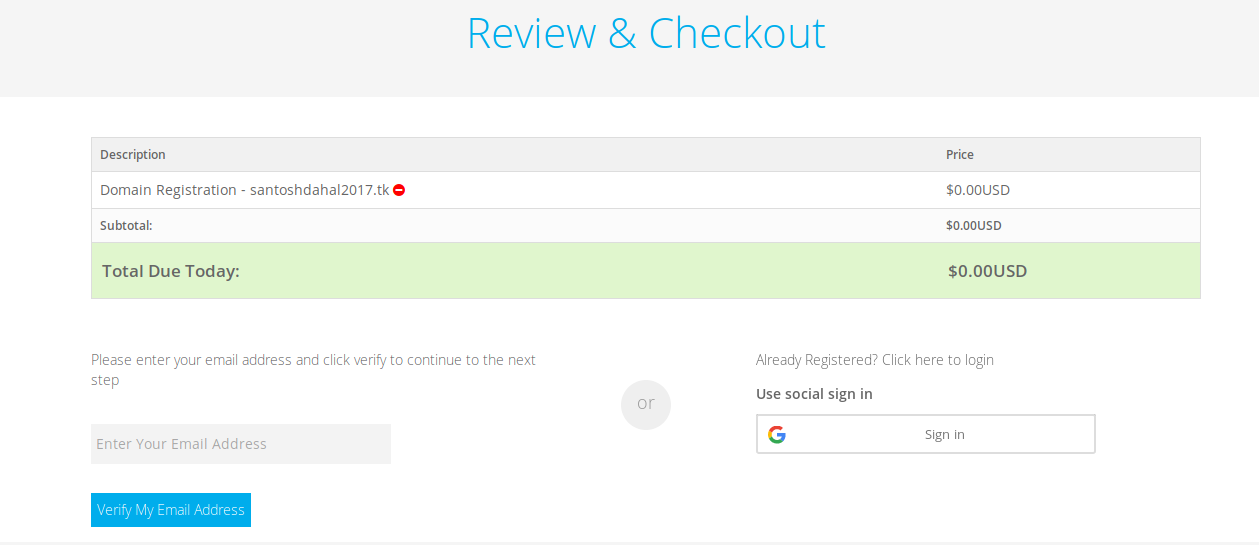
Review & Checkout : Select appropriate Sign in method
-
Verification Email will send to your email , open email and verify yourself
-
Add Details and Complete order
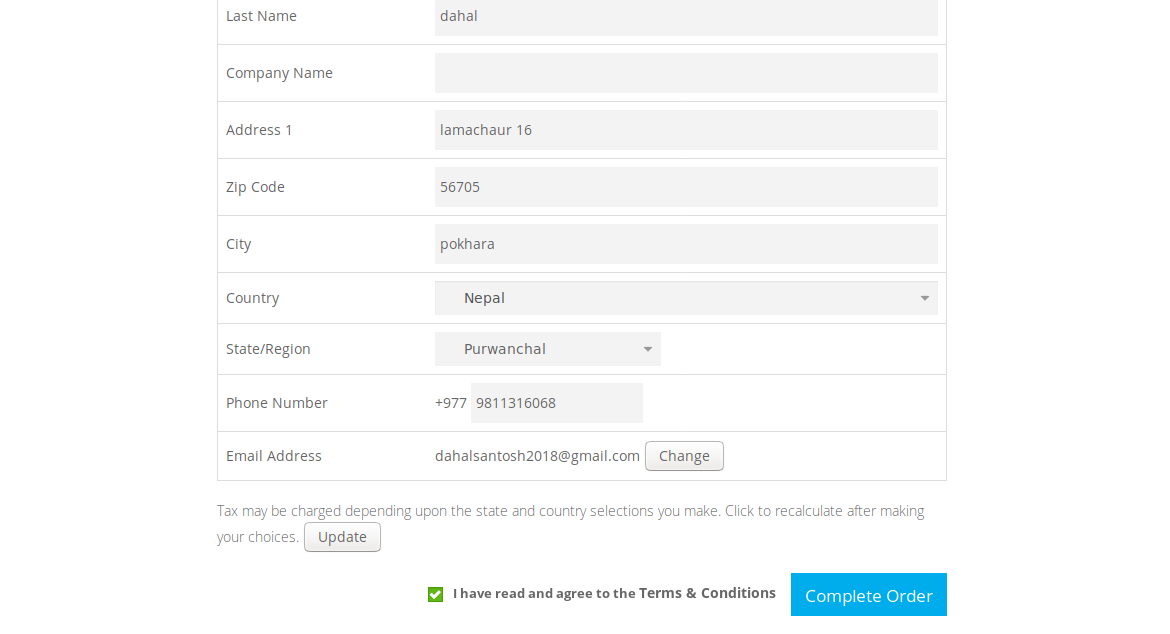 Fill `Address 1`, `Zip Code`,`City`,`State/Region`,`Phone Number`
Mark Term and Condition and Click on Complete order
-
Congratulations! Your Domain Name created!
-
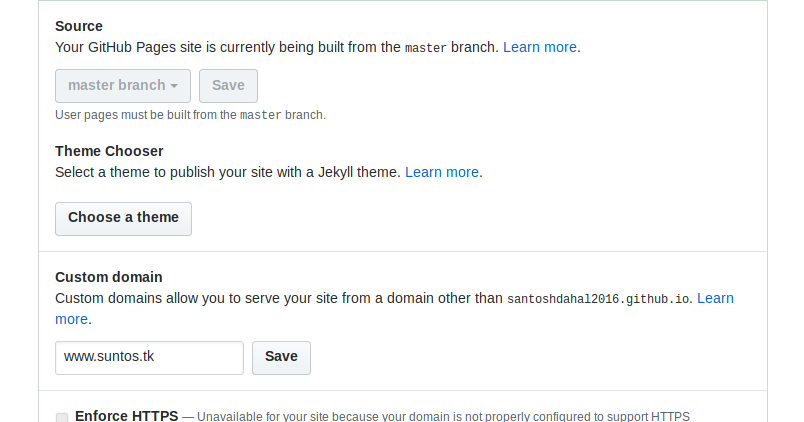
Now add domain to Github account . Go to github , open your repository and go to setting , Scroll down add your .tk domain as soon below
Link Github hosting and Domain
-
Go to www.cloudflare.com and click the Sign up link at the top of the page.
-
Create a Cloudflare account by typing your email address and password. Click Create account now to proceed
-
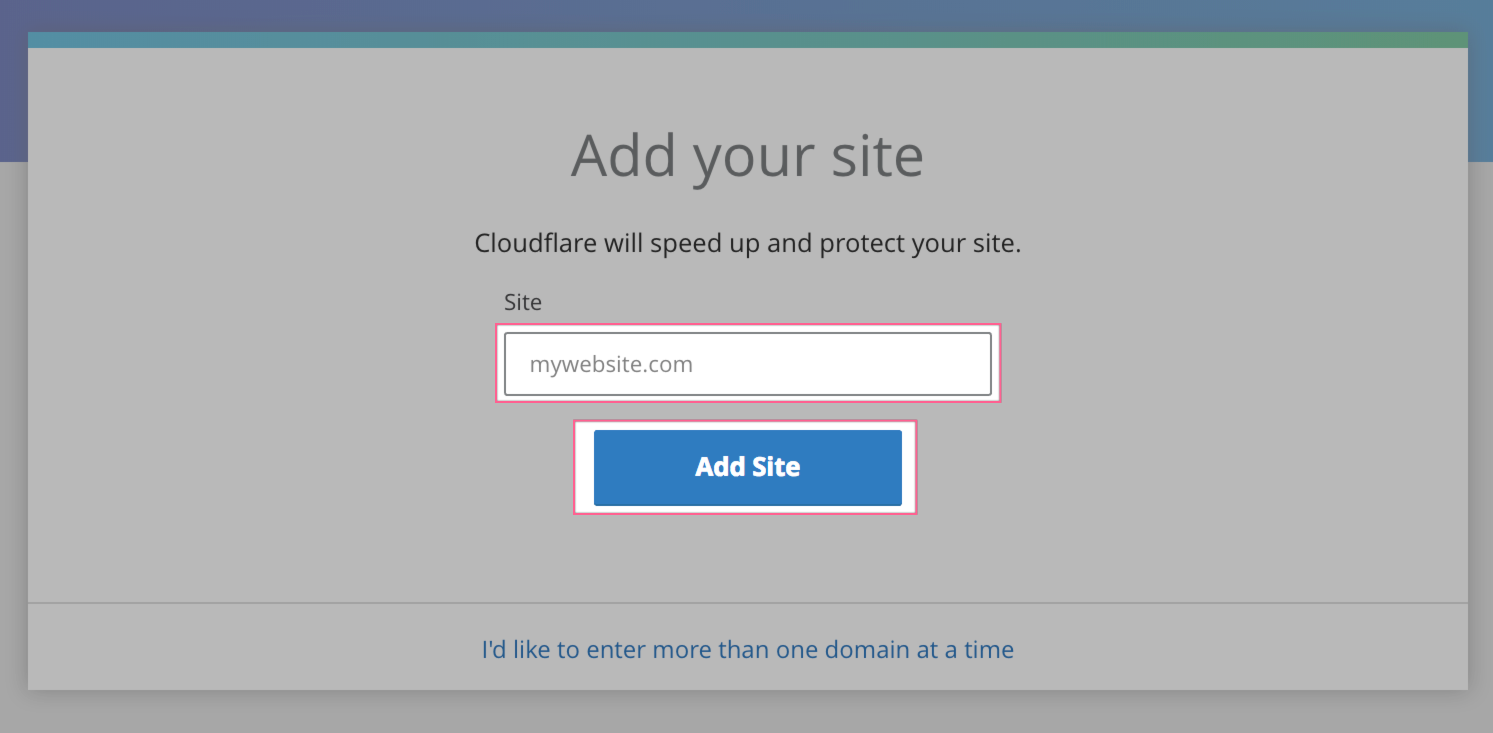
Enter the domain for your website and then click Add Site. It's not necessary to add "www" to the domain. For example, if your website is www.example.com.np, type example.com.np
-
We will scan your domain's DNS records. This will take approximately 60 seconds to complete. Once the DNS scan has finished, click Next.
-
Select a Free plan and then click Confirm Plan.
-
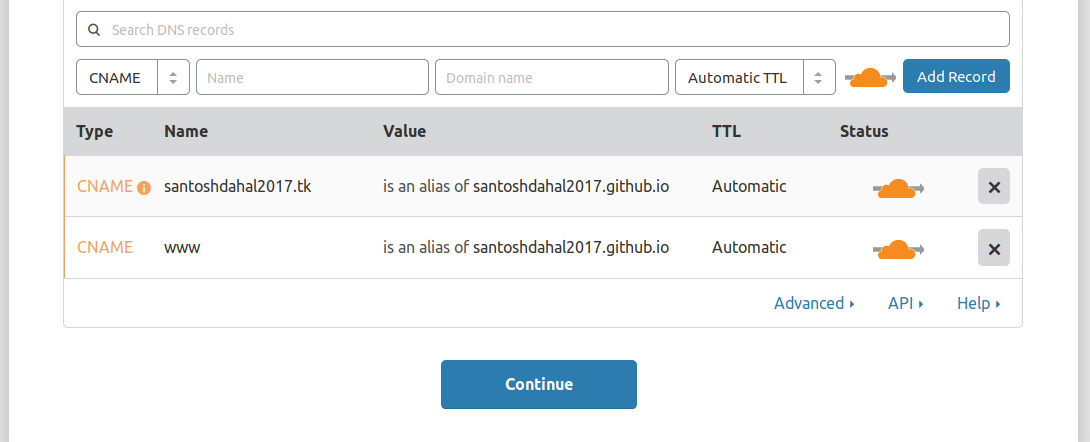
You will have empty dns record as shown below
- Add two CNAME as shown in picture below
- On the final step, you are given the Cloudflare nameservers for your domain. The Cloudflare nameservers are assigned to your domain and listed on this page.
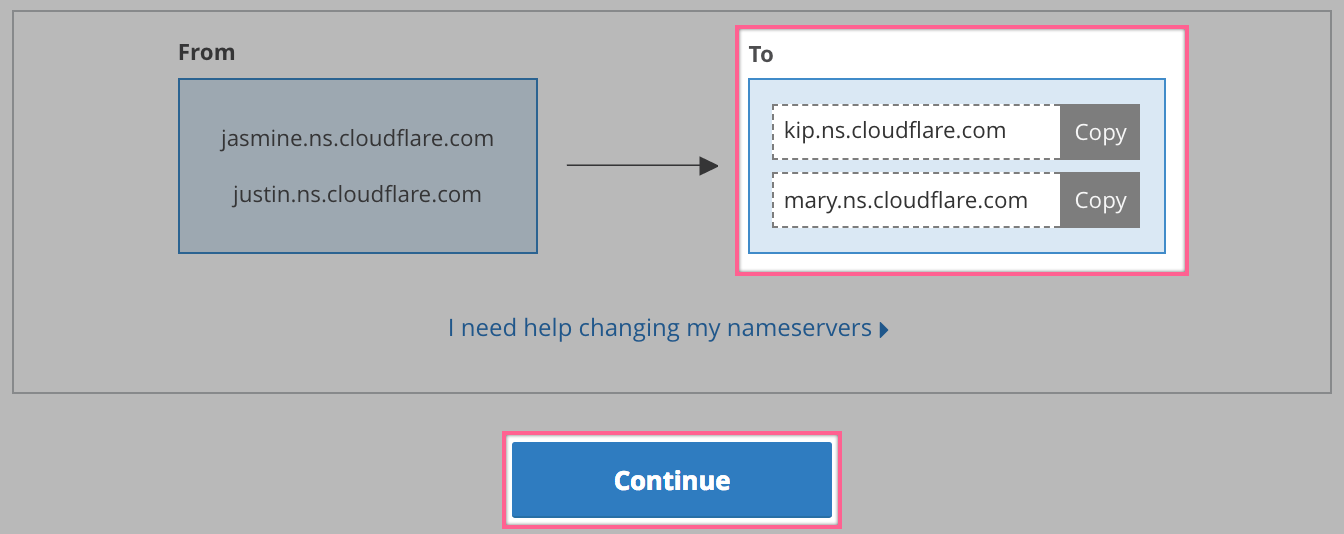
::: warning
Change Name server of dot.tk domain as Specified
:::
Click Continue.
- Congratulations! You've successfully created your new Cloudflare account!
::: warning
In order to work you must Change Name server of dot.tk domain as Specified and rescan domain in Cloudflare
:::
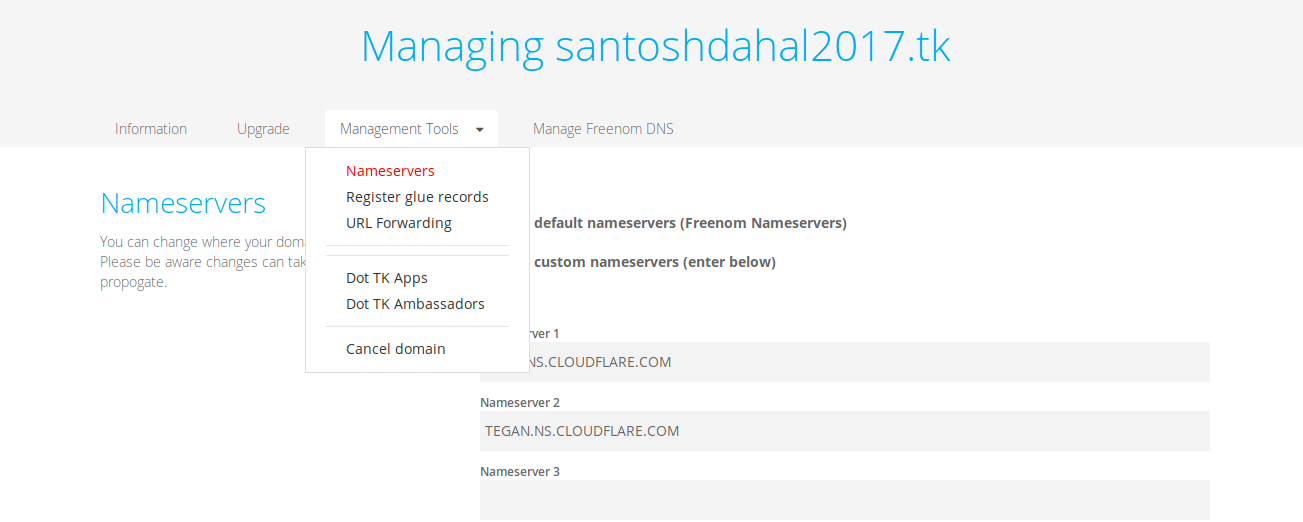
- You can Change Name server of dot.tk domain as follow
Management Tools>Nameserver
Congratulation ! Your website must be live
If You faced any error , Please don't forget to comment